Table of Contents
We are using Git to manage our source code, Jenkins for continuous integration and Gerrit for the code review. We assume that you understand the benefits of version control, continuous integration and code review but you might not know the specific utilities. This chapter should help you find out how they are integrated and how you are going to use them.
You will need to get the source code from our main git repository. After you have completed modifications to the source you can create local commits. Your commits can be pushed to a repository you own or you can push them into the Gerrit code review system. This will result in Gerrit creating a Chase and will lead to the Jenkins server being triggered and asked to compile and test your commits. The result will be returned to Gerrit. Your teammates are asked to make reviews of your. You are asked to modify your change until both the Jennkins result and the feedback of your teammates is positive. Your commits will be automatically integrated into the main repository.
Git is a modern and widely
used version control system. We assume that you have already worked with
another version control system and will solely focus on some Git basics
and how this is can be used in the context of Saros. The central concept
is a Git Repository, it is located in the
.git/ subdirectory and holds the entire history of
the project (branches, commits, all versions of files).
The Git checkout command takes a specific
revision from your local repository and updates, adds and removes files
from your Git working directory to match the state
of that revision. Git commit allows you to create a
local commit that will be stored in your local Git Repository. The
Git Index is a unique concept that represents the state
that will be used for the next commit. You will mostly use it to add a new
file, remove an existing one. An advanced usage of the Git Index
is to partially add modifications of a file to the index, in the beginning
you will probably not want to use that specific feature though. Git
allows you to create local branches that are branched off any Git commit
that is already in the local Git Repository. In case you
created a Git Commit too quickly you can always amend
to the last one. Once you want to share your changes you will need to
Git push, this will move your local changes to the
remote Git Repository. To get changes from a remote
Git Repository you will need to use the Git
pull. This will transfer all commits from the remote repository
to your local one and it will try to move your changes to the top of the
history. The last operation is called a Git rebase.
There are plenty of Git introductions available on the web, some describe the technical details, some are for people coming from Subversion, some show how to use the Eclipse integration. The Git website has a documentation section with links to good documentation. If the following guide is not enough you should be able to find information there.
EGit Plugin versions
The below procedure was tested with Eclipse 3.7.1 and EGit plugin version 1.3.0.201202151440-r.
Procedure 4.1. Git clone Saros
Begin
→
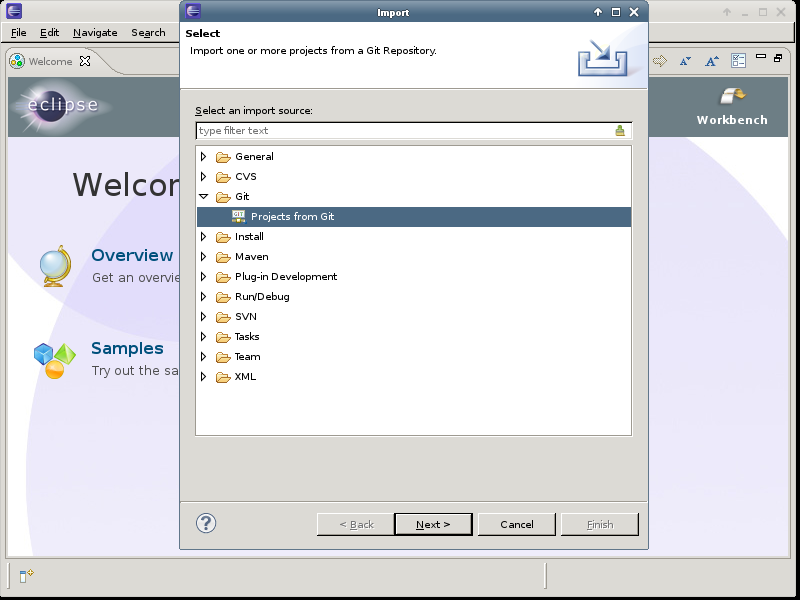
Select import from Git
Select → and press .
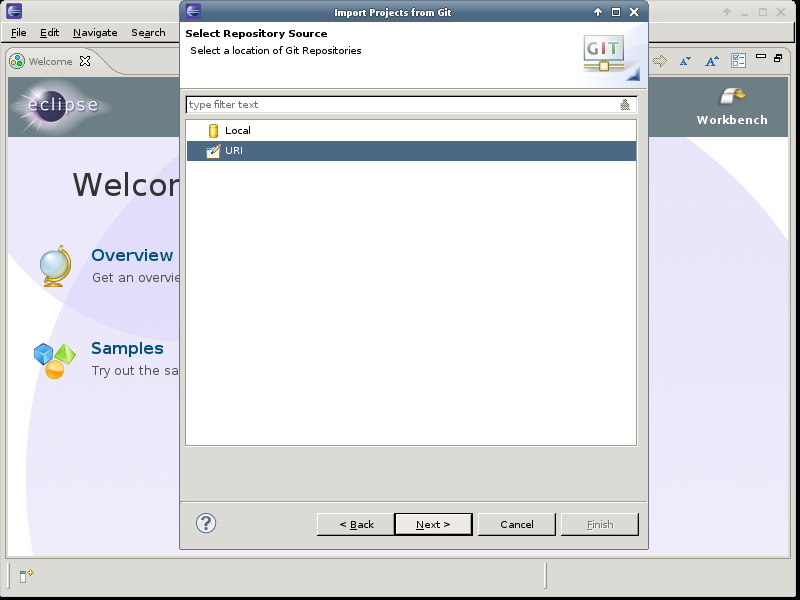
Select Repository Source
Select and press .
Source Git repository
Fill in dpp.git.sourceforge.net as Host, use gitroot/dpp/saros as repository path and select git as the protocol and finish by pressing the button.
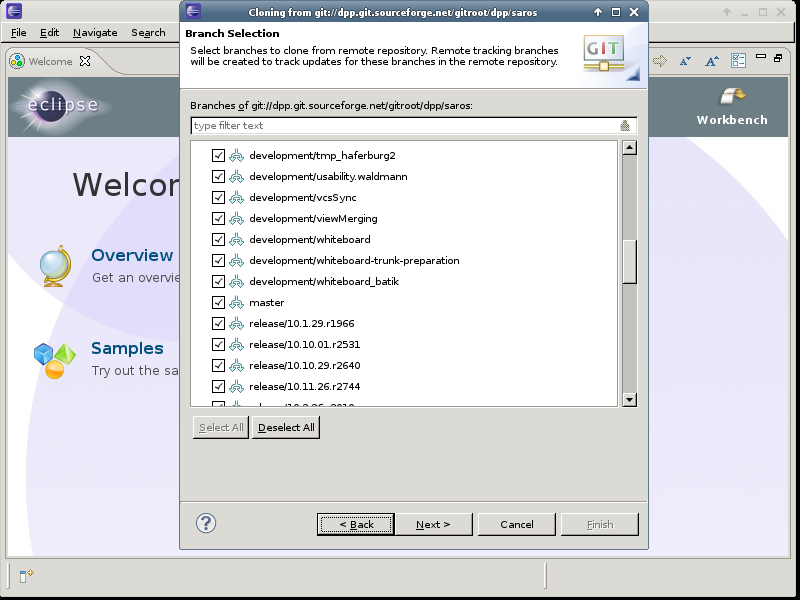
Select the branch
Select the master branch and continue by pressing .
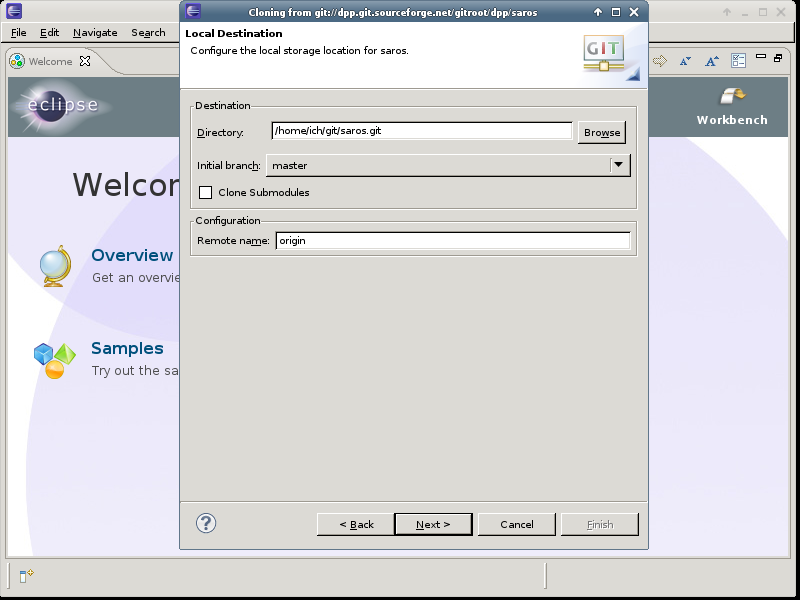
Select local destination
Decide where to store the cloned Git repository. The proposed directory should work and press .
Cloning the repository
Progress of downloading the repository is shown.
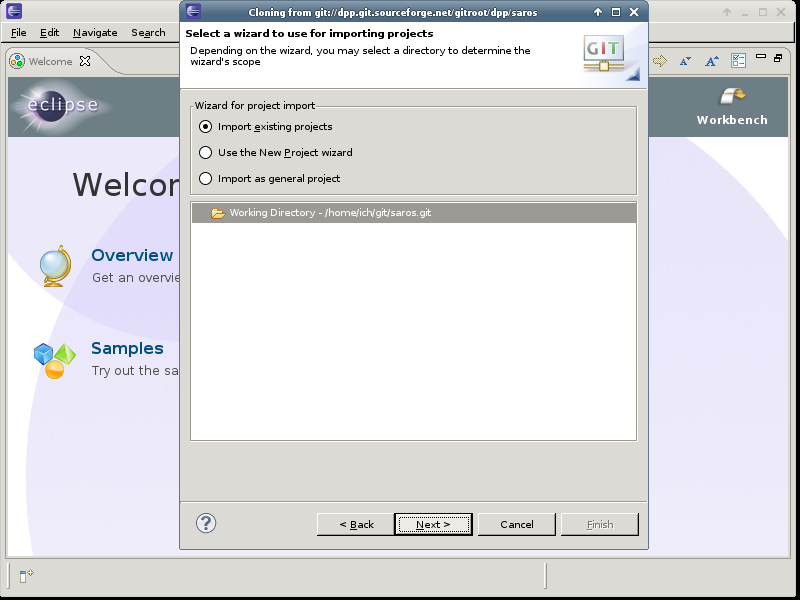
Select project directory
Select Import existing projects and import the top level directory Working Directory and continue using the button.
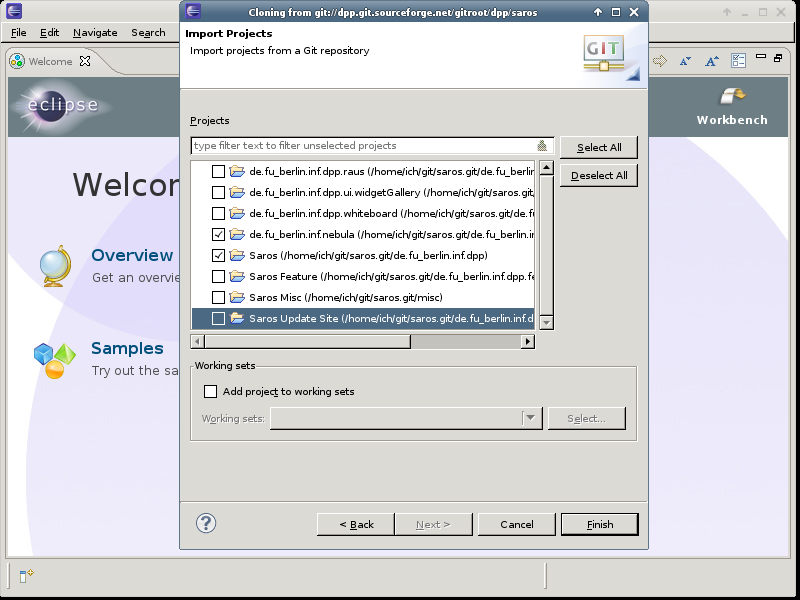
Import projects
Select at least the de.fu_berlin.inf.nebula and Saros to import.
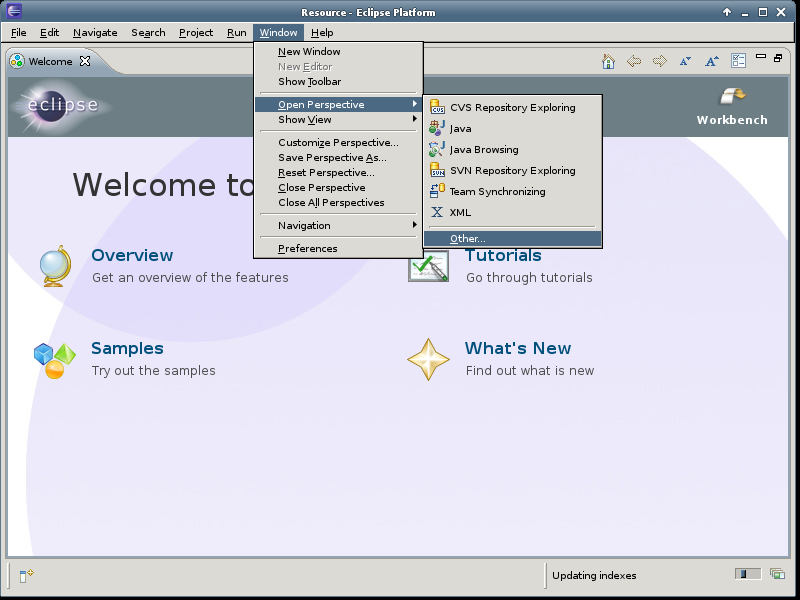
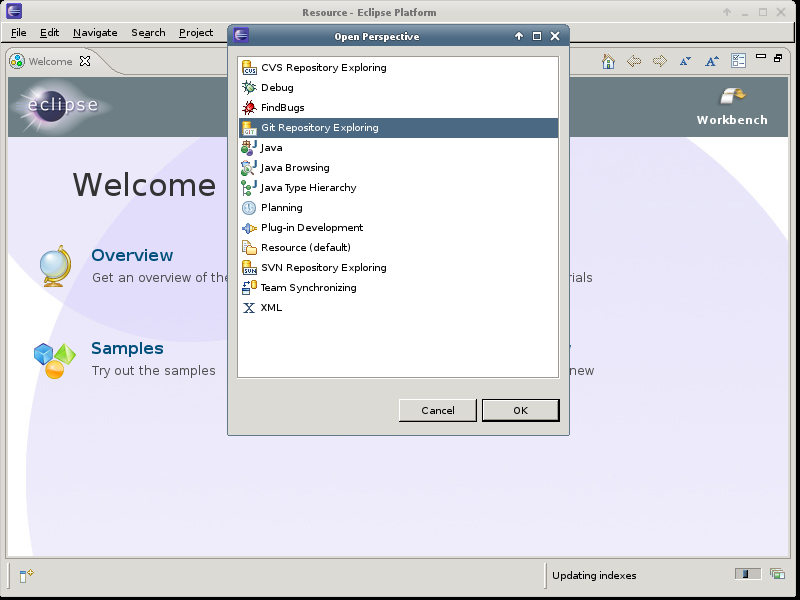
Switch to Git Perspective
Clicking on + → and select the Git Perspective.
Enter Gerrit Configuration
Unfold the Saros, Remotes and origin folder. Use the context menu and select Gerrit Configuration.
Configure Gerrit
Use ssh://saros-build.imp.fu-berlin.de:29418/saros.git as the Push URI and refs/for/master as the Destination branch.
Verify EGit is enabled
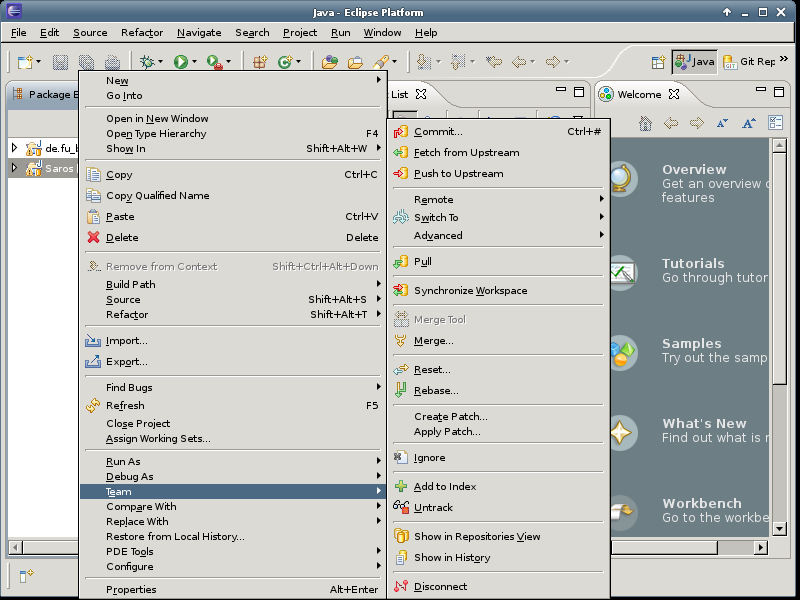
Switch to the Java Perspective and use the context menu in the Package Explorer and verify that the contains options for commit.
Procedure 4.2. Git clone Saros
Begin
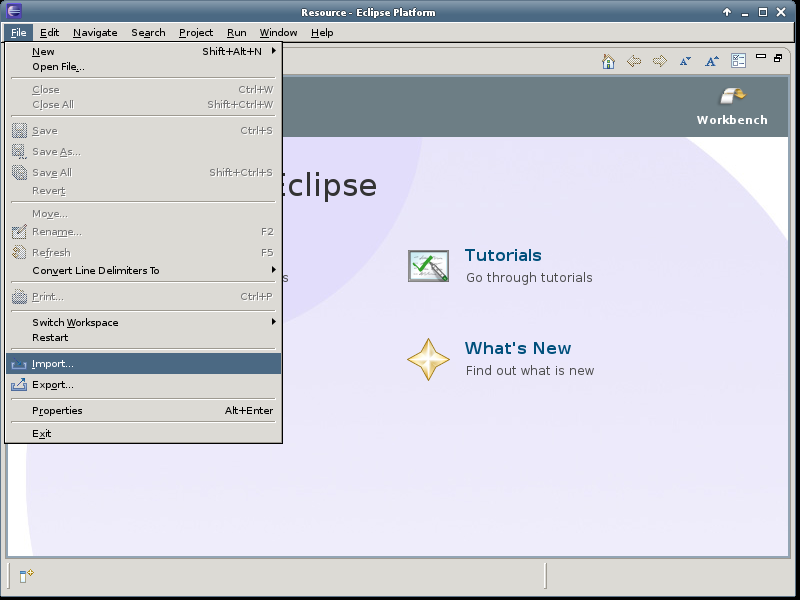
Select import from Git
Select Repository Source
Source Git Repository
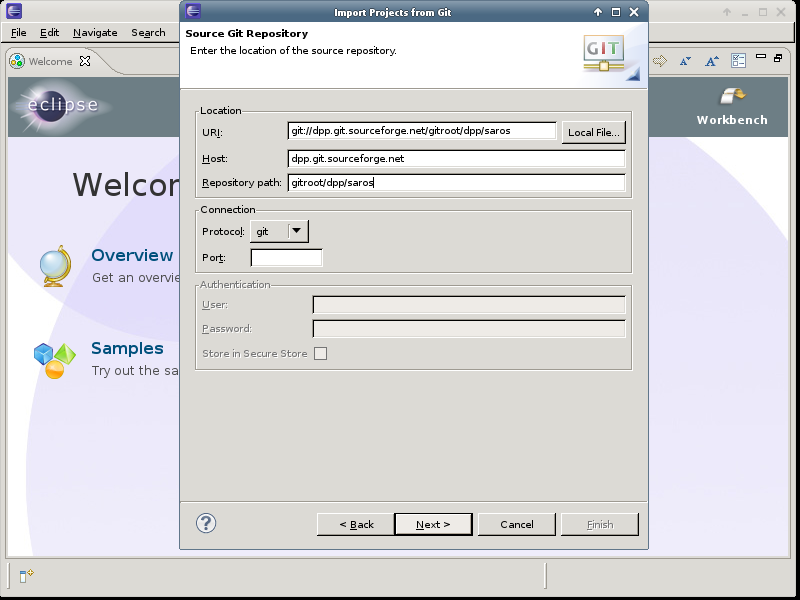
Host: dpp.git.sourceforge.net, Path: gitroot/dpp/saros
Select the branch
Select local destination
Cloning the repository
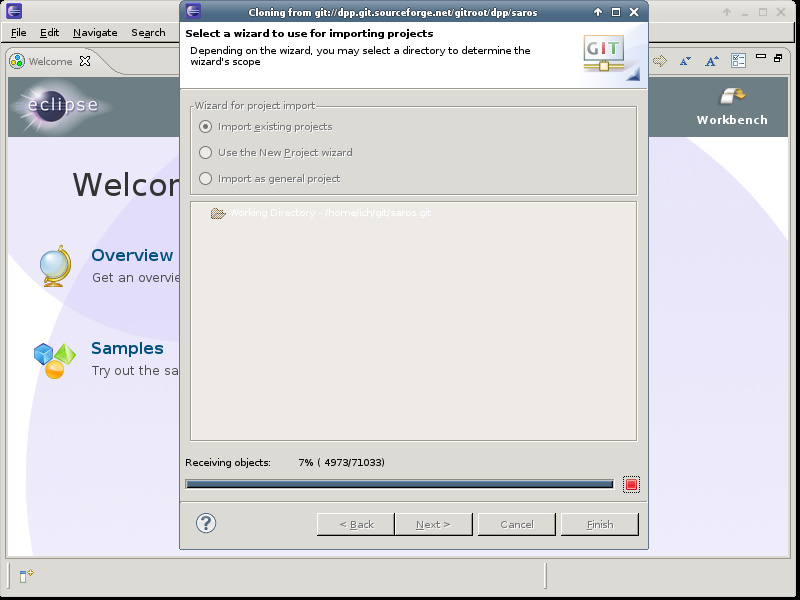
Select project directory
Import projects
Switch to the Git Perspective
Switch to the Git Perspective
Enable Gerrit
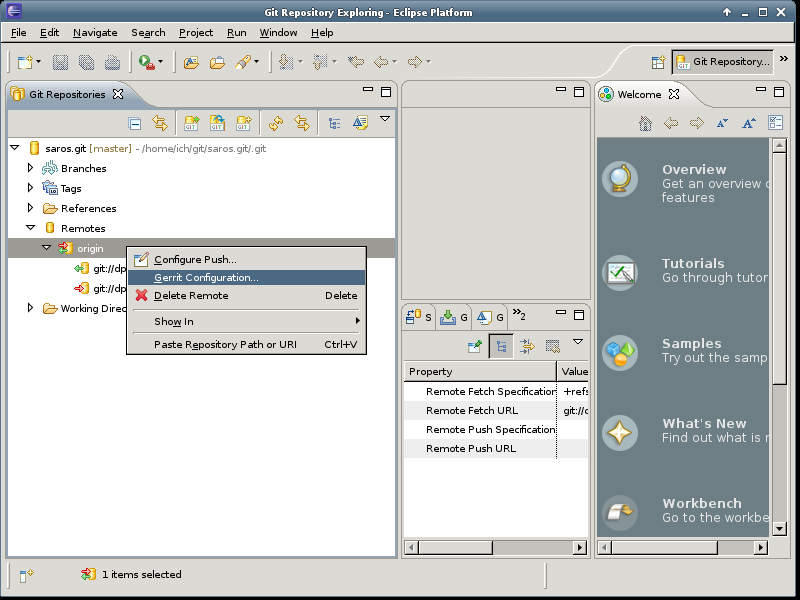
Configure Gerrit
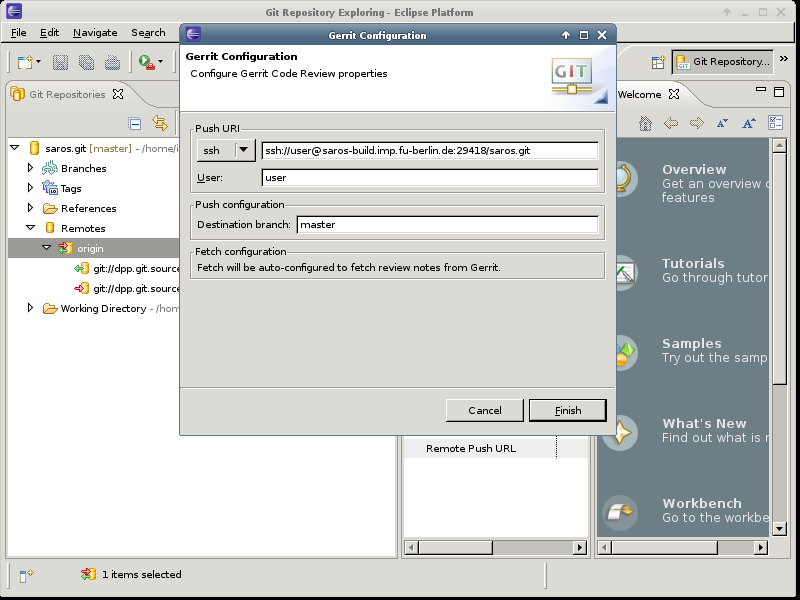
Use saros-build.imp.fu-berlin.de and refs/for/master
Verify EGit being used in the Java Perspective
