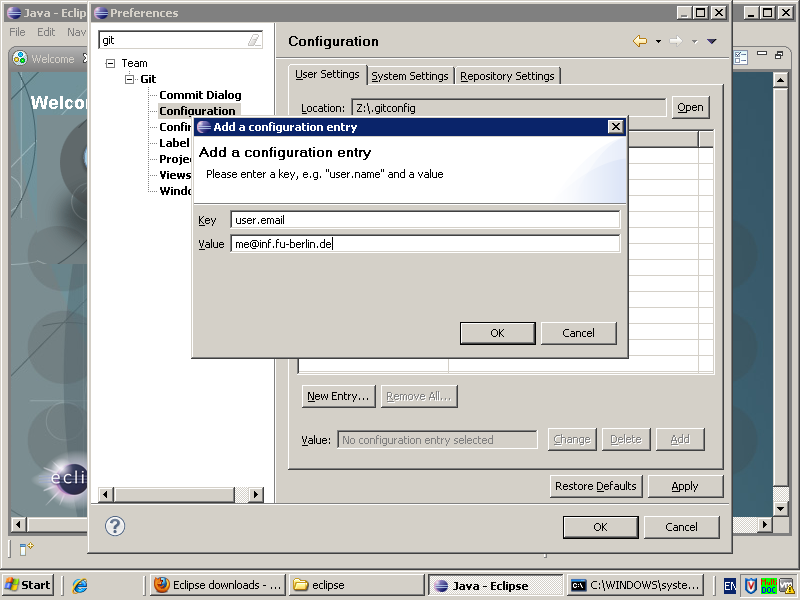
So far you managed to clone a remote Git repository and have checked out the default branch. To make local commits you will need to set a name and email address. If you do not do this Gerrit might reject your commits. If you want to make your changes available and ask for review you will need to push your local commits into the Gerrit Git repository. Git is using SSH to communicate with remote Git repositories, you will authenticate with your private SSH key. The following sections will show you how to do it.
You can create SSH keys using Eclipse. The following procedure will explain the process.
Procedure 4.3. Creating an SSH keypair
Open the preferences
→

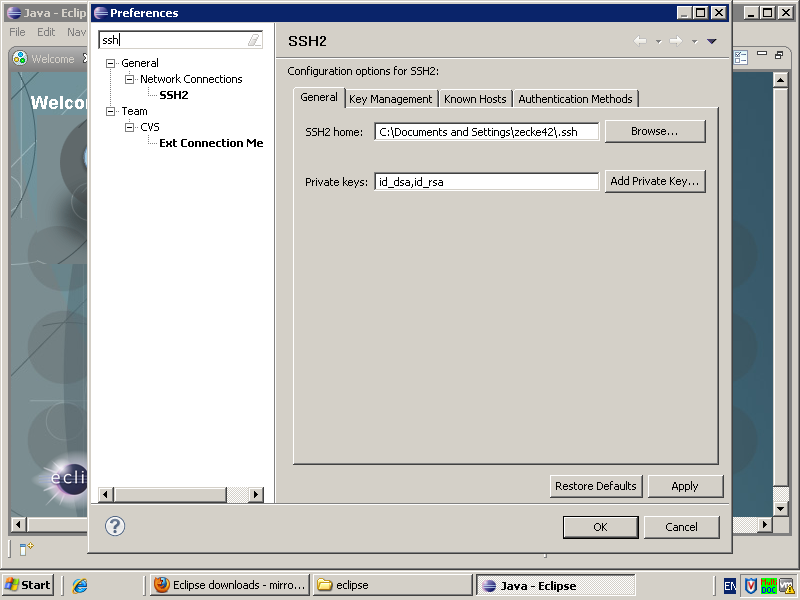
Select the SSH Configuration
Enter SSH into the search field and select SSH2.
Switch to the Key Management tab
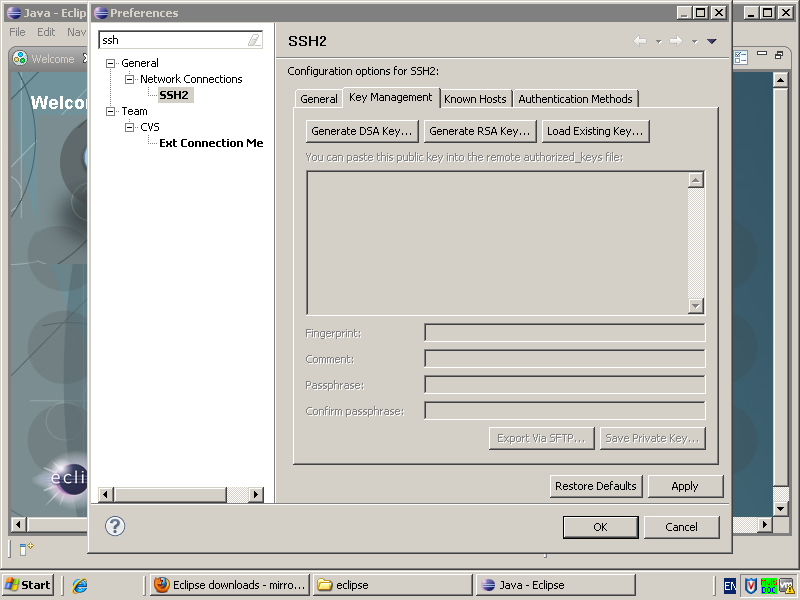
Generate a RSA key
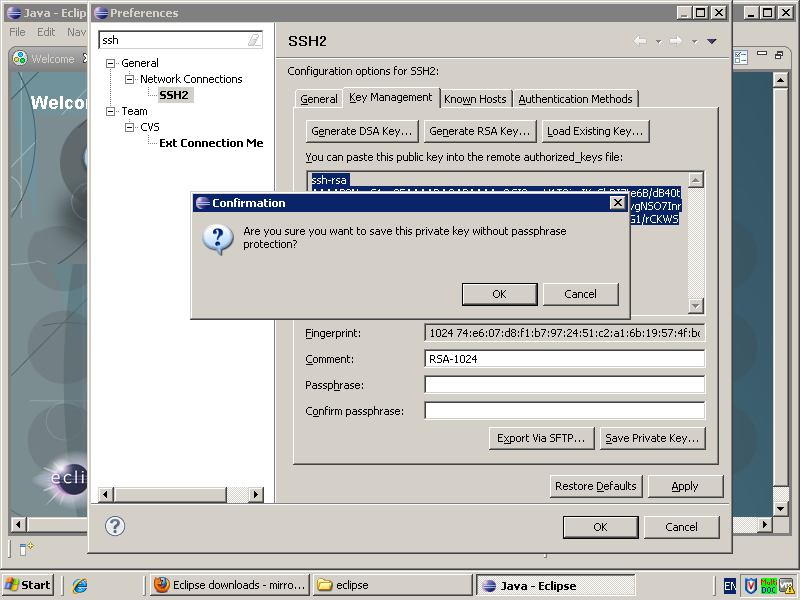
Select the to generate a new key pair. Optionally set a password. The selected text is the public key and needs to be used for Gerrit.
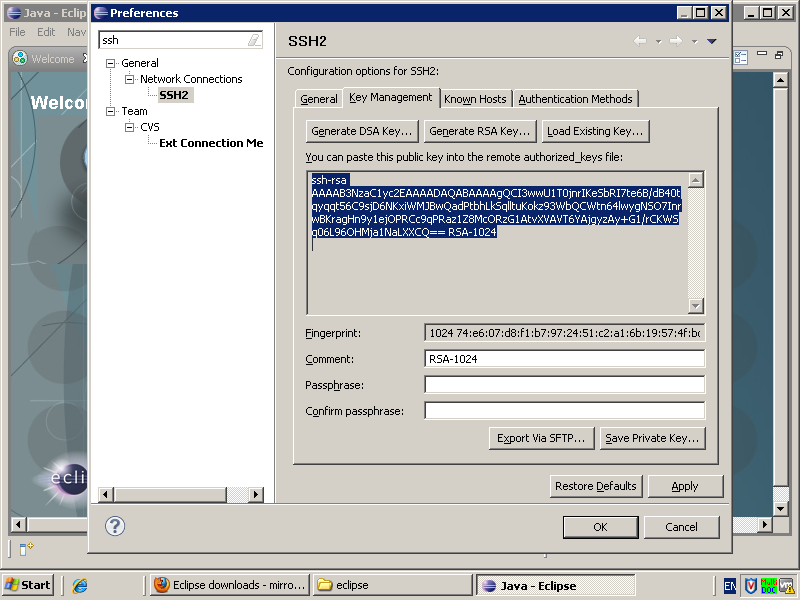
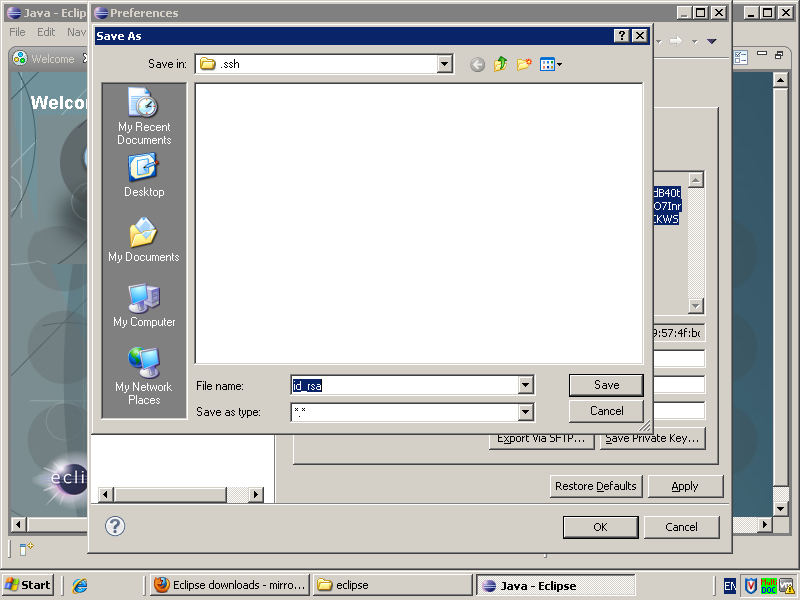
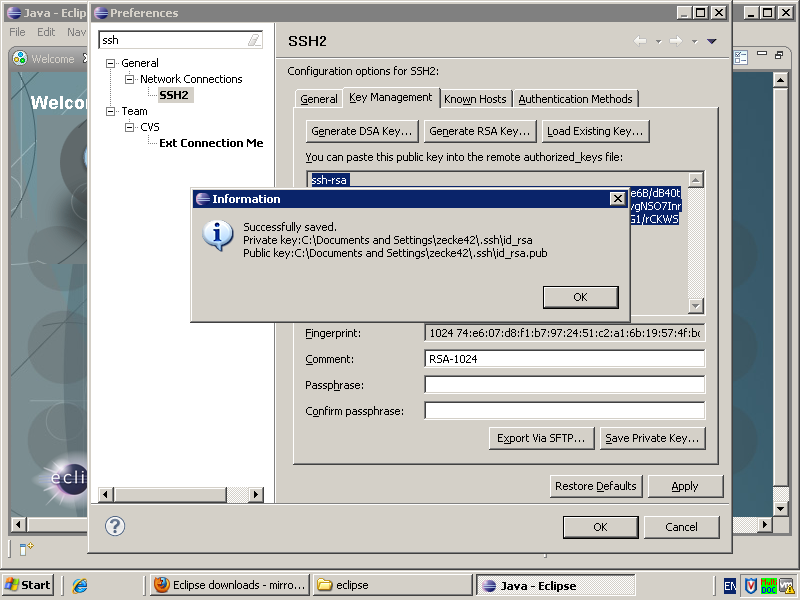
Save the Key
Press to store the new keypair. This will require clicking a couple of times.
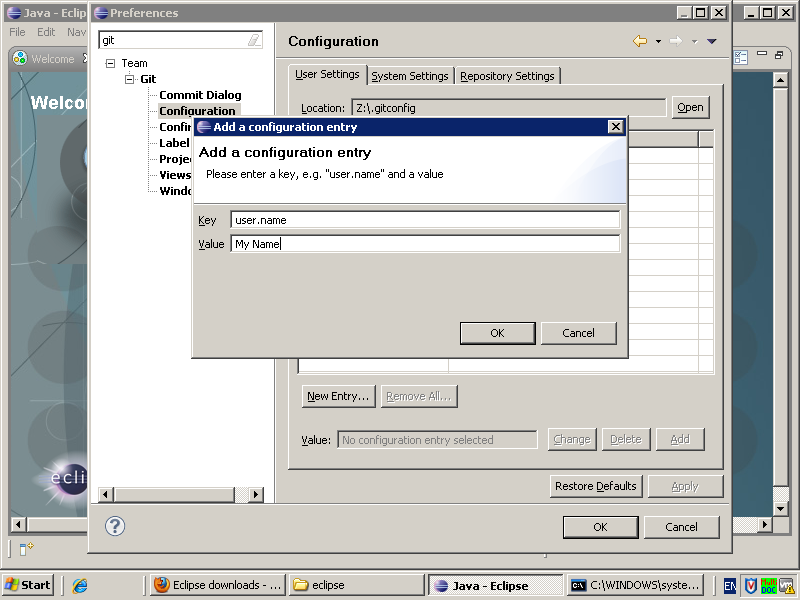
You will need to set your name and email address. Git has a very simple configuration format. You will need to set the keys user.name and user.email to the names of your choice. The below procedure will show you how to do it and then you are ready to make local commits.
Procedure 4.4. Configuring Git
Open the preferences
→

Open the Git Configuration
Search for Git and select the Configuration page.
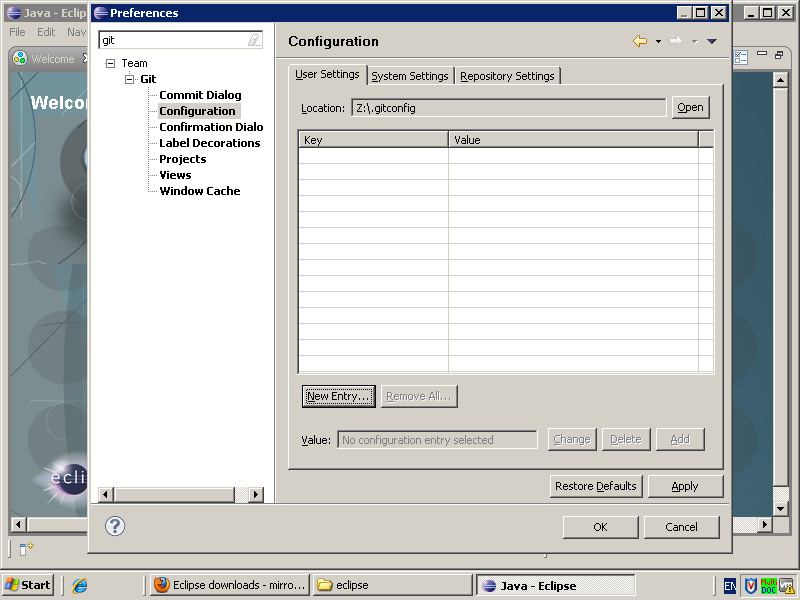
Add an entry for your name
Press the button and use user.name as the key and set your name as the value.
Add an entry for your email address
Press the button and use user.email as the key and set your email address as the value.
