JTourBus allows to describe aspects of the code as route. Each route has a numbered list of stops inside the code. The route can be browsed from within eclipse using this plugin. JTourBus is used in Saros to document the basics and the following will inform you on how to install the plugin.
Procedure 3.5. Installation of JTourBus
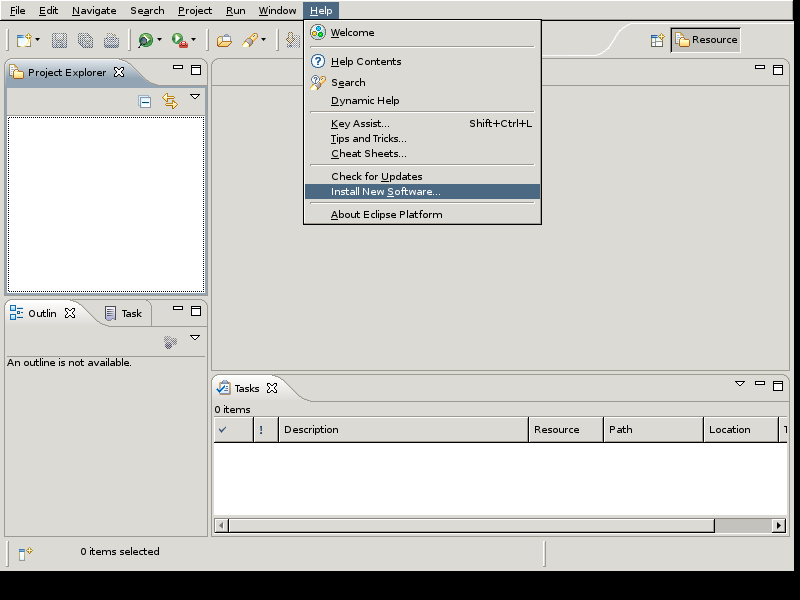
Open the New Software Dialog
→
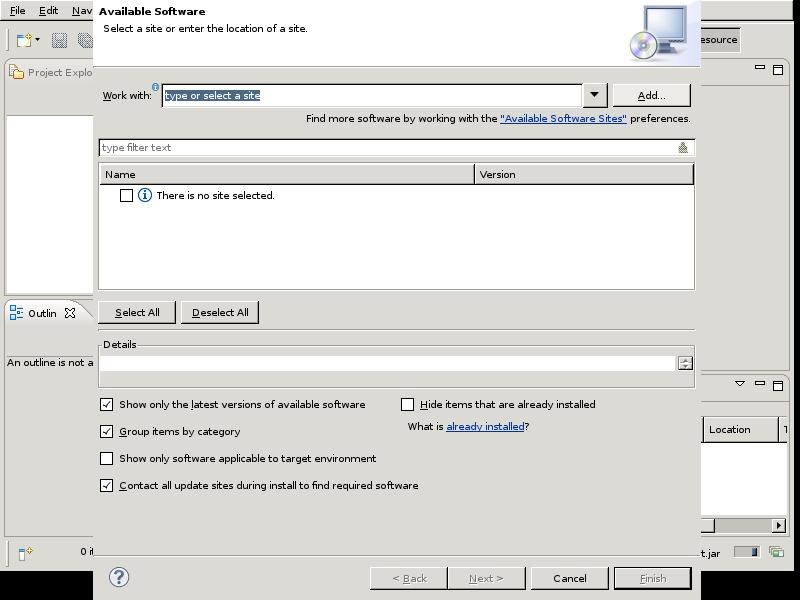
Press the Add Button to add a site
to add the site.
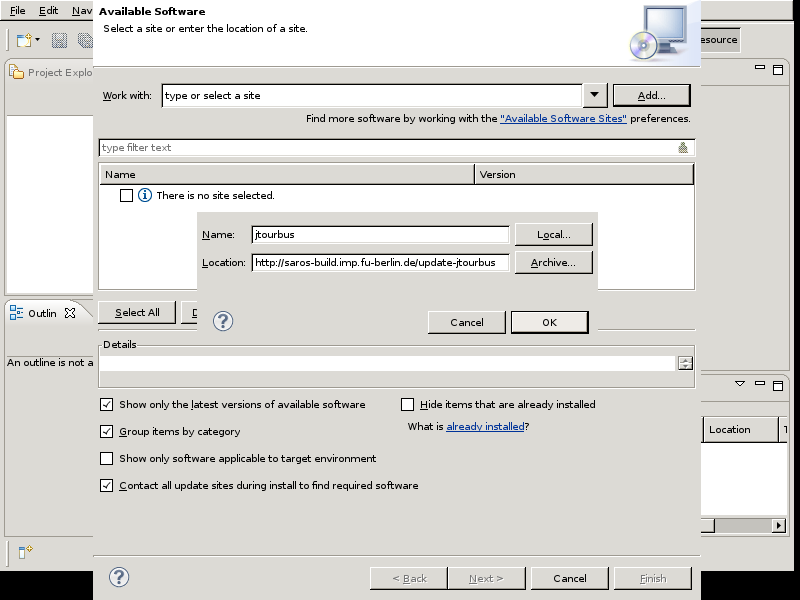
Add JTourBus repository
Pick a name for the Name field, enter the following http://saros-build.imp.fu-berlin.de/update-jtourbus into the Location field and press .
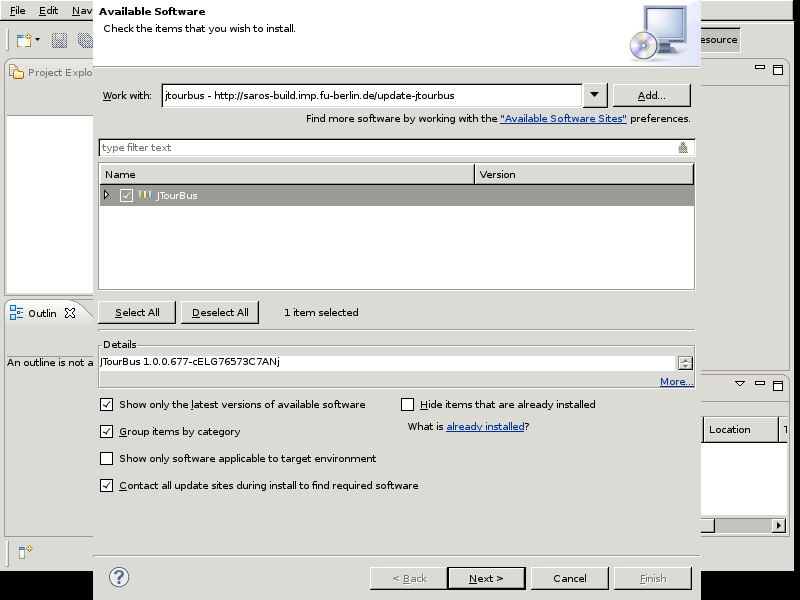
Select JTourBus
Select JTourBus and press button.
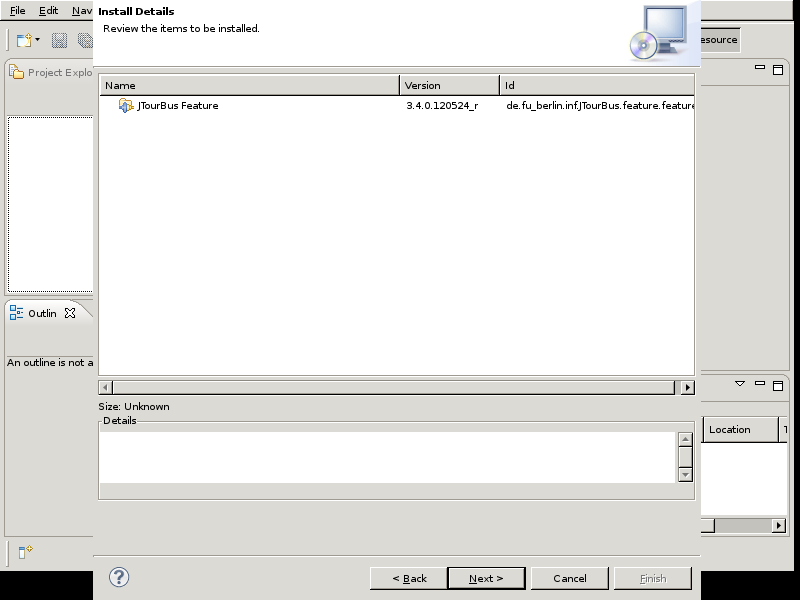
Review the Installation details
Review the installation details and continue by pressing the .
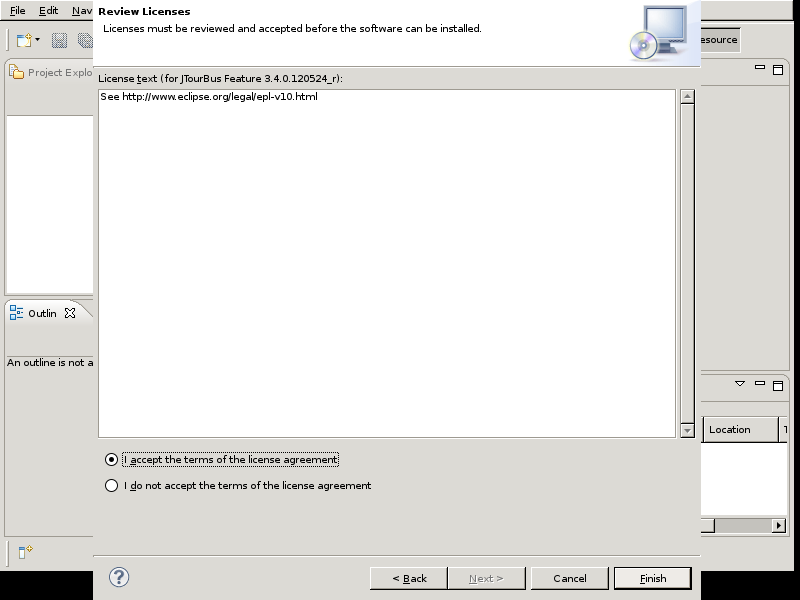
Accept Licenses
Review and accept the license and continue by pressing . This will start the installation
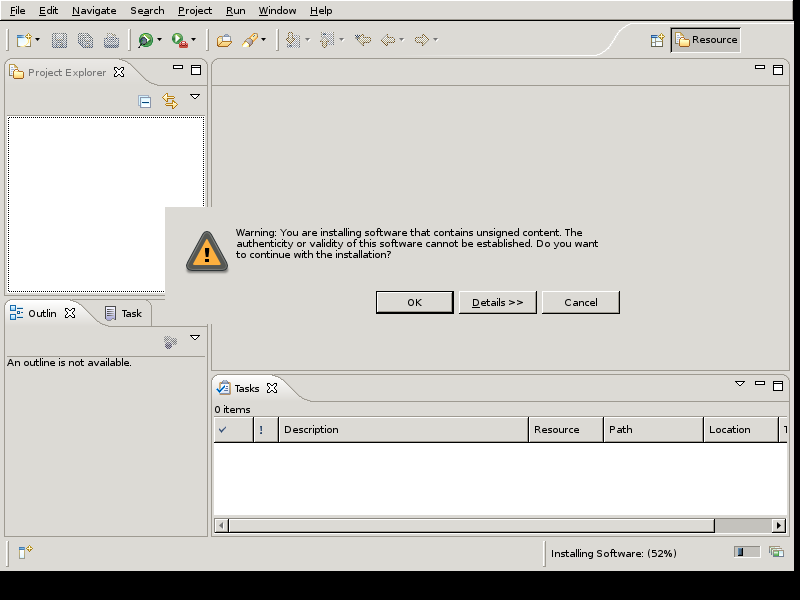
Accept unsigned content
Press to install unsigned content.
Installation Process
You will be presented the progress of the installation
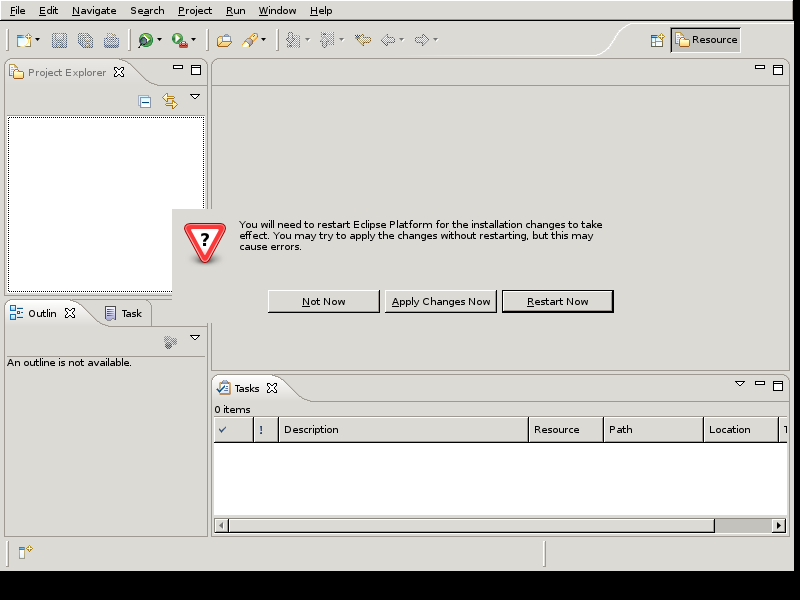
Restart Eclipse
You will be asked to restart Eclipse at the end of the installation.
